  |
||
 |
 |
 |
 |
 |
||
| reference articles | competition journal | piping links | FAQ | contact me |
Andrew's Tips: How to Tie Ghillie BroguesBy Andrew T. Lenz, Jr., Santa Cruz, California, ©2005
A Bit of Background on Ghillie Brogues. These days, ghillie brogues appear at first glance to be a dress shoe with the tongue removed. In fact, some pipers do exactly that—whether it be for comfort or economy. But to look the best, a real set of ghillie brogues can't be beat. There are a number of different brands of ghillie brogues on the market and there can be a significant difference in weight of the shoes as well as slightly different cuts of the shoes. (I bought a second pair to replace another pair that wasn't compatible with my foot geometry—they hurt my ankle—and found the new pair to be delightfully light in comparison. Great for parades!) You may wish to try on a few different brands when acquiring new shoes. Also when purchasing shoes, keep in mind that with some shoes the soles are only glued (which typically will be adequate for mild weather), while others' soles are stitched for durability (these can hold up better in the extremes of very hot and very wet weather).
Now, How to Tie.
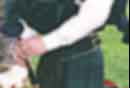
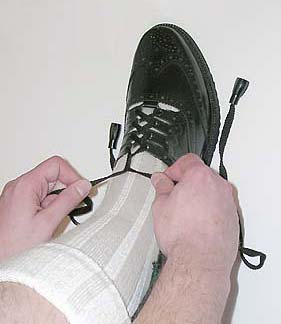
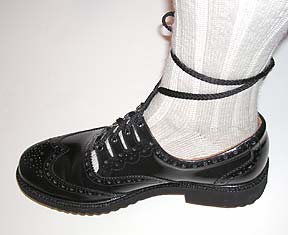
For the front of your shoe, pull the laces reasonably tight—make sure there isn't slack back and forth through the eyelets—then twist them around each other. The number of twists (half rotations) usually numbers between three and six. If the twists are too loose, they look floppy and your laces may slip later. If they are too tight, the laces become an unpleasing jubbled mass of laces. I should note here that some pipers prefer to do a half-hitch with the laces prior to doing any twists—others don't.
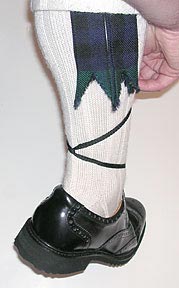
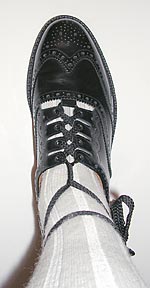
At the rear of your leg, pull the laces tight then again twist them around each other. The number of twists usually numbers between 2 and 4 turns—though some do no turns at all. The only real rule is to have less turns in the back than the front. Again, some pipers prefer to do a half-hitch with the laces in the back prior to doing any twists—others don't.
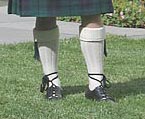
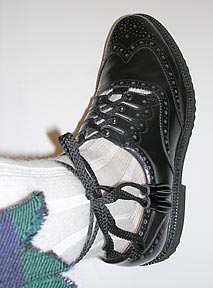
Some—many competing drum majors, for instance, they like things symmetrical—tie the bow on the front, others—like myself, arguably more traditional—tie it on the side. The pipers in the Scottish regiments tie the knot directly under the flash (see flashes discussion below). Regardless of where you place your bow, do a typical half-hitch prior to tying the bow as you would when tying a regular shoe. Some pipers make the mistake of tying the laces too high up the leg. It should wrap no more than a couple of inches above the ankle bone. Better too low than too high. If you end up with lots of extra lace, you can wrap the laces once again around your ankle. Another option, depending on the construction of your tassels, would be to cut the laces shorter then resecure the tassels—these are also called "toggles"—on the ends. If you want really exacting control over the length of your dangling tassels once the knot is tied, you can go back and make the length of lace on one side of the untied shoe longer than the other—3" to 4" longer can work well. Most pipers don't bother with this, but if you are a perfectionist and the lengths for the bow aren't exactly right to you, it's a good solution.
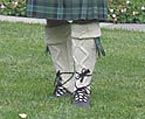
Slipping Laces. If you find that your laces slip down over the course of a day, and you aren't just tying them too high on your leg, you have a few options. First would be just to live with the inconvenience and just retie them as needed. Second, pull them very tight, though this can be uncomfortable after a relatively short time. Yet another option—if you are not limited by a band uniform requirement—would be to purchase a pair of heavily textured hose to help support the laces (see the piper on the right at the very top of this page for an example). Yet another possibility is to try flat laces if you are using round laces, as flat laces will behave differently. Still another option is to use a small safety pin on the inside of your hose and slip the pin through the laces knot to secure it in position—if you don't mind a small safety pin resting against your skin for a while. But most pipers, if they don't tie the laces too high, don't have a slipping laces problem. Since they appear in the photos, we'll briefly address flashes. There are two standards with regard to the location of the flashes. The official UK way is to have the leading edge of the flash line up with the shin bone. The "we're not under control of the throne anymore" (USA, and perhaps elsewhere) way is to have them fully on the side. In the above photos, the flash appears a touch farther back that it should be. (Partly due to camera angles, and partly due to the haste of the "photo shoot." Sorry to burst your bubble, but only one hose and one brogue was put on!) Conclusion. Tying ghillie brogues is really a very simple operation. The only trick is knowing just how to do it! After some practice, like many things, it'll become second nature. Additional reference. On another site, there's a short online video clip of ghillie brogue tying. It should be noted that some feel the laces are shown tied slightly high in the video, I'm also of that opinion.
If you have comments or suggestions, please contact me. This page last updated Sunday, March 14, 2010 |
| sitemap | ||

